Agent Mode User Guide
Getting Started
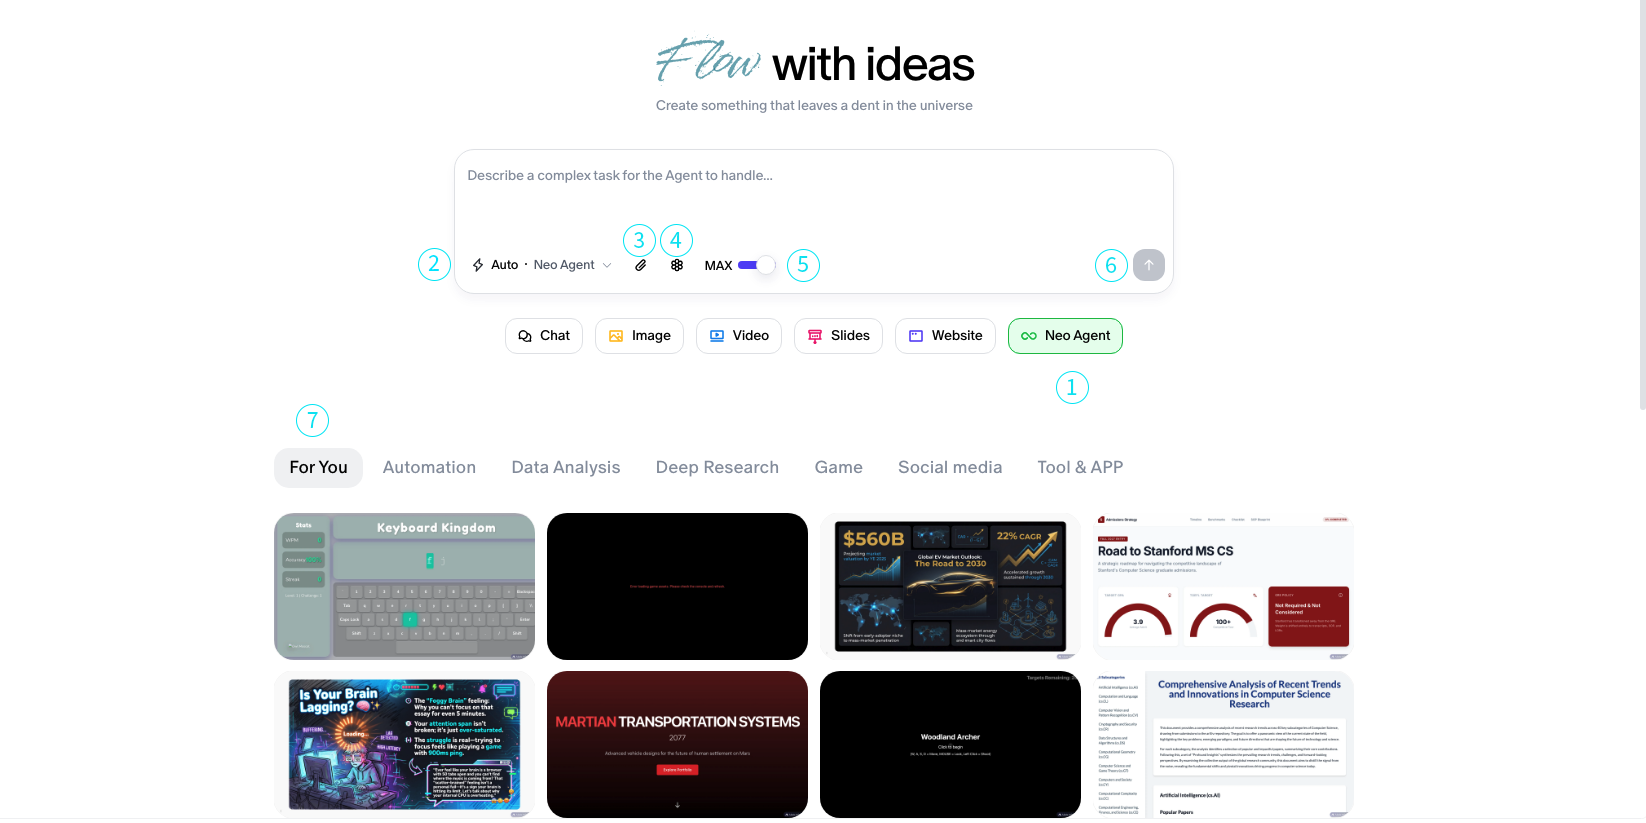
Agent Mode Interface Guide
1. Agent Mode Toggle
- Button:
AGENT MODE ON/OFF - Function: Enables or disables autonomous task planning, execution, and re-planning.
When enabled, Neo autonomously handles multi-step tasks using the defined runtime tools and constraints.
Control Panel Buttons
2. Agent Mode Drop Down
Available Modes For Neo
-
Auto Mode: Let Agent Neo deicide the best mode to use to complete the task
-
Text: Articles, Reports, and other Documents
-
Image: Great for batch output from a single prompt
-
Video: Agent Neo will create video content for you
-
Slides: Create presentation, reports, documents, children short stories, or visual tutorials
-
Website: Build and iterate websites with Agent Neo
3. Max Reasoning Toggle
Function: Determine the Agent mode between Max or Fast Modes Usage: Use fast mode if you need quick generations or rapid brainstorming. Use Max mode for workflows that require more reasoning and effort to complete
4. Upload Button
Function: Upload external files or documents into the canvas context. Usage: Use this to load task-relevant data into the current canvas session.
5. Knowledge Base Toggle
Button: Honeycomb icon between Max toggle and File Upload button Usage: Enable to allow Neo to reference saved documents or context in planning.
Useful when working with previously uploaded documents, structured data, or multi-turn knowledge workflows.
6. Start Button
Icon: Arrow with “start” label Function: Triggers agent execution using current input. Usage: Final step to launch the plan once your input is ready.
7. Inspiration For You
Below the prompt input field we have provided a collection of projects to help you find inspiration for your workflows, feel free to browse the projects and use our prompt templates
Getting Started in the Canvas
- Enter your request in the input box.
- Ensure Agent Mode is enabled.
- Use the control buttons to configure your agent before running.
- Click the Start button to launch the agent execution.