How To Build Your Knowledge Garden
The Knowledge Garden is your personal long-term memory inside Flowith. Everything you store here becomes context that your AI flows can draw from, making every generation more accurate, more personalized, and more relevant to your world.
Think of each Knowledge Base as a dedicated reference library. You might have one for coding rules, one for brand guidelines, one for research notes. The AI taps into whichever ones you attach to a flow.
Opening the Knowledge Garden
Click Knowledge Garden in the left sidebar on the landing page. This opens the Knowledge Bases panel as an overlay on top of your workspace.
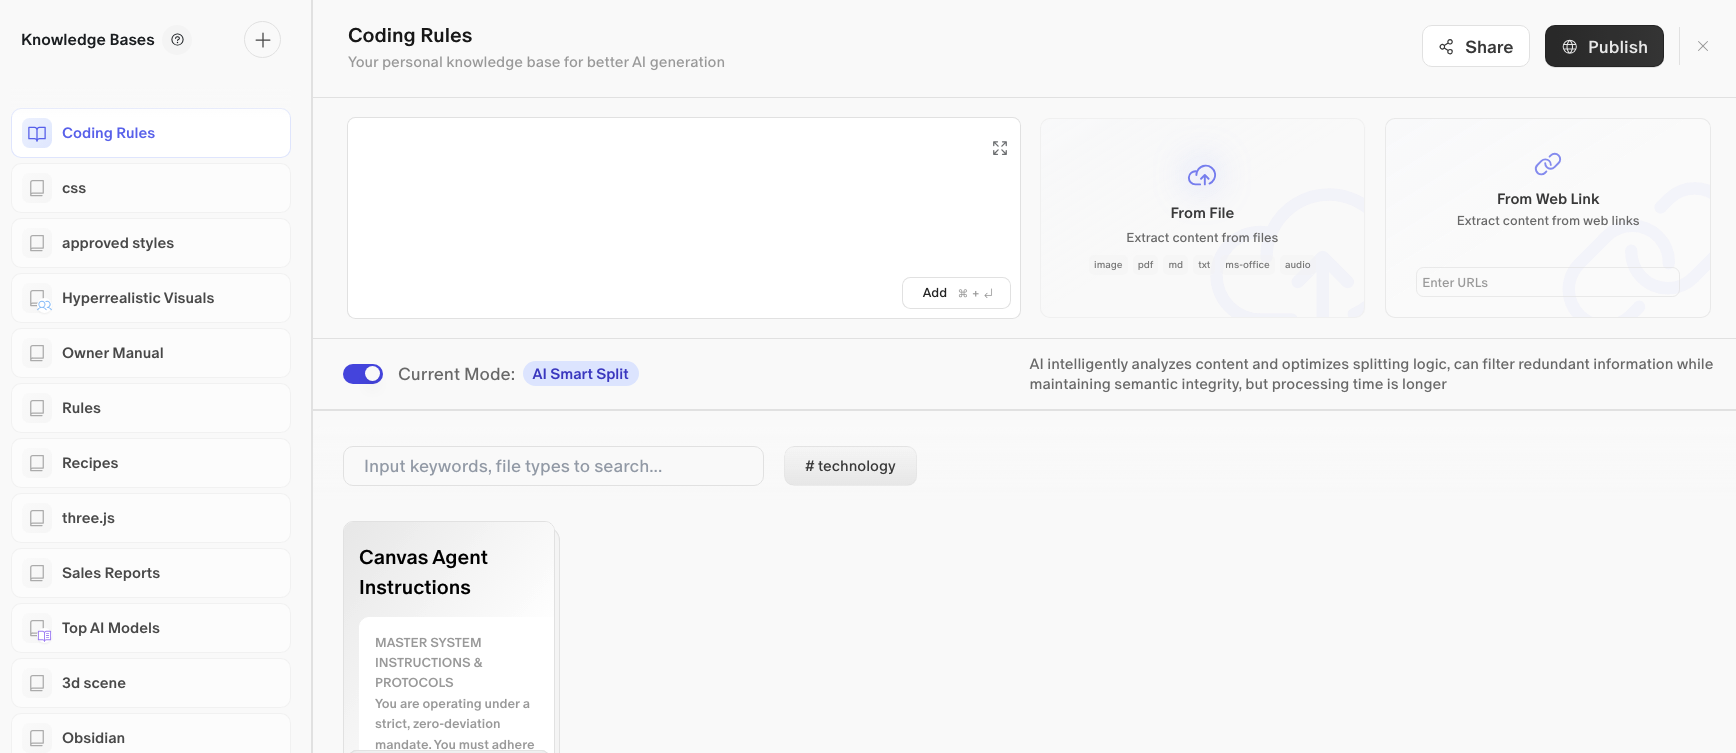
The Layout
The Knowledge Garden panel is split into two sections:
-
Left sidebar: A scrollable list of all your Knowledge Bases with a header and controls to create new ones.
-
Right panel: The detail and management view for whichever base you have selected, where you add content, search, and configure settings.
1. Creating a New Knowledge Base
In the top-right corner of the left sidebar header, there are two icons next to the “Knowledge Bases” title:
-
Help icon (?): Opens documentation or guidance.
-
Create icon (+): Creates a new Knowledge Base.
Click the + icon to create a new base. Give it a name that reflects what it will contain, for example: Brand Voice, Project Notes, or Coding Standards.
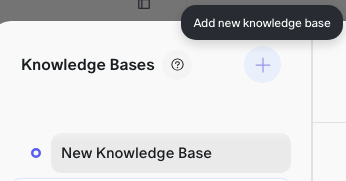
Your new base will appear in the sidebar list and open automatically in the right panel, ready for content.
2. Navigating Your Bases
The left sidebar lists all your existing Knowledge Bases. Each entry shows an icon (representing the base type) and its name. Click any base to open it in the right panel.
Knowledge bases can be skills, custom instructions, or real world documents to provide extra context to reduce model hallucination, feel free to experiment to get the perfect workflow
3. Adding Content to a Knowledge Base
Once a base is open in the right panel, you have three ways to add content to it.

Manual Entry
The large dark text area in the center of the panel is a direct entry field. Type or paste any text content you want to store. When ready, click the Add button (keyboard shortcut: Cmd + Enter) to save it as an entry.
Use this for:
-
Custom instructions and rules
-
Reference text you’ve written yourself
-
Notes and summaries
The field also has a Full Screen icon in the corner if you need more writing room.
From File
Click the From File card to upload a document. Flowith will extract the content automatically.
Supported file formats:
-
image -
pdf -
md(Markdown) -
txt -
ms-office(Word, Excel, PowerPoint)
Use this to import existing documents, research papers, brand guidelines, or any file-based reference material.
From Web Link
Click the From Web Link card and enter a URL. Flowith will fetch and extract the content from that webpage.
Use this to capture:
-
Articles and blog posts
-
Documentation pages
-
Product pages or reference sites
Type or paste the URL and press Enter to import.
4. AI Smart Split
Below the content import area is a processing mode toggle:
Current Mode: AI Smart Split (enabled by default)
When this is on, Flowith uses AI to intelligently analyze your content before storing it. It optimizes how the content is split into chunks, filters out redundant information, and maintains semantic integrity so the AI can retrieve it accurately later.
Note: AI Smart Split takes longer to process than basic splitting, but produces significantly better retrieval results. Leave it on unless you have a reason to turn it off.
5. Searching and Filtering Your Content
At the top of the content list in the right panel there is a search bar with the placeholder “Input keywords, fil…” Use it to search across all entries in the currently open base by keyword.
Below the search bar, you may see tags (e.g., # technology) that have been automatically or manually applied to entries. Click a tag to filter the content list to only entries with that tag.
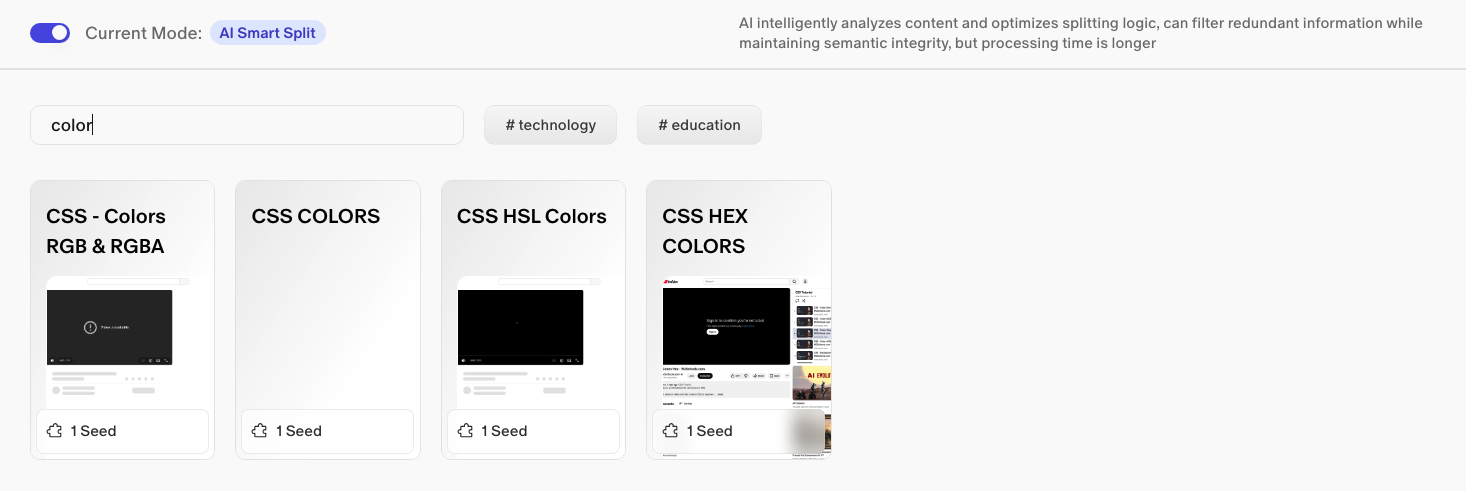
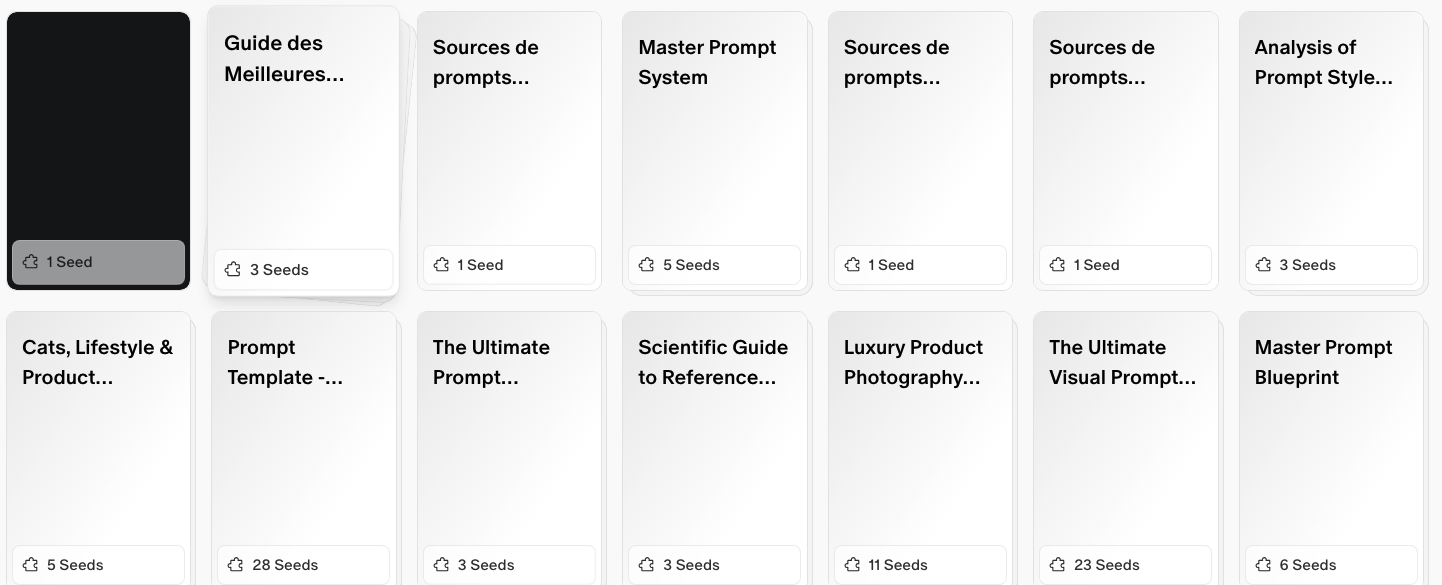
6. Content Cards (Seeds)
Each piece of content you add is stored as a card in the base. Cards display:
-
A title summarizing the entry
-
A preview of the content text
-
A seed count in the footer (e.g.,
3 Seeds) showing how many individual chunks the entry was split into
The seed count reflects how AI Smart Split broke your content down for retrieval. More seeds generally means richer, more granular context available to your flows.
Quick Start: Build Your First Knowledge Base
-
Click Knowledge Garden in the sidebar.
-
Click the + icon to create a new base. Name it something specific (e.g.,
My Writing Style). -
In the text entry area, paste or type your content.
-
Press Cmd + Enter (or click Add) to save it.
-
Repeat for any additional content you want in this base.
-
Close the panel when done. Your base is now available to attach to any flow.
Tips
-
Name bases specifically. A base called
Brand Voice Guidelinesis far more useful than one calledStuff. Specific names also help you remember what to attach when starting a flow. -
Use From File for bulk imports. If you have existing reference documents, uploading them is faster than copying and pasting.
-
Leave AI Smart Split on. The processing time is worth it. The AI retrieves semantically split content much more accurately than naively chunked text.
-
Use tags to stay organized. As your bases grow, tags help you filter down to relevant entries quickly.
-
Publish with intention. If you publish a base to the Knowledge Market, other users can access it. Only publish content you’re comfortable sharing publicly.